An article
Return to
Articles
page
A minimalist carder
Carding fibers by hand can be a pleasurable experience. I've always enjoyed it. However, when the arrival of several new fleeces coincided with a sudden urge to blend large quantities of wool and silk, I started looking around for other options.
Drum carders are undeniably nice, but their pricetags are discouraging. The idea of being able to card a nice-sized batt is tantalizing, though, and I yearned to do that. One day while housecleaning, the solution literally fell into my arms: a large wooden spool, which could serve as the 'foundation' of a carding drum!
The spool suggested a plan. Here's the long and short of it.
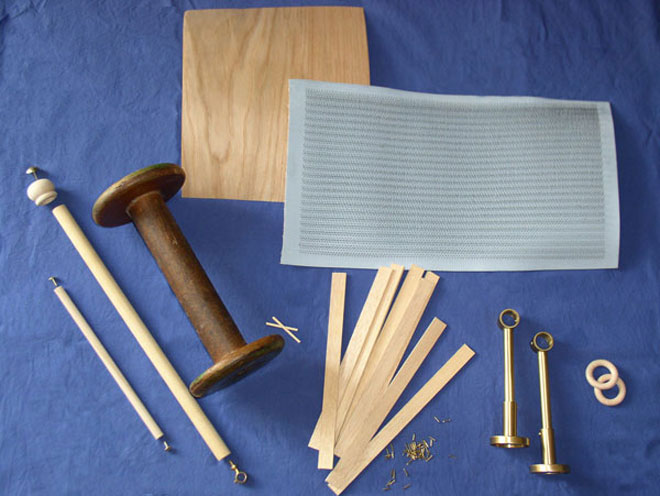
These are the parts:
- the big spool (or two wooden discs)
- wooden slats (for the sides of the drum)
- carding cloth (purchased by the inch)
- curtain-rod hardware (uprights to support the drum)
- a large dowel for the axle
- a small dowel for the handle
- tiny brads (nails)
- staple gun, hand saw, small hammer, drill, screwdriver
A piece of veneer is also shown in this photo; I'd thought it would be needed to smooth out the sides of the drum, but it was unnecessary.
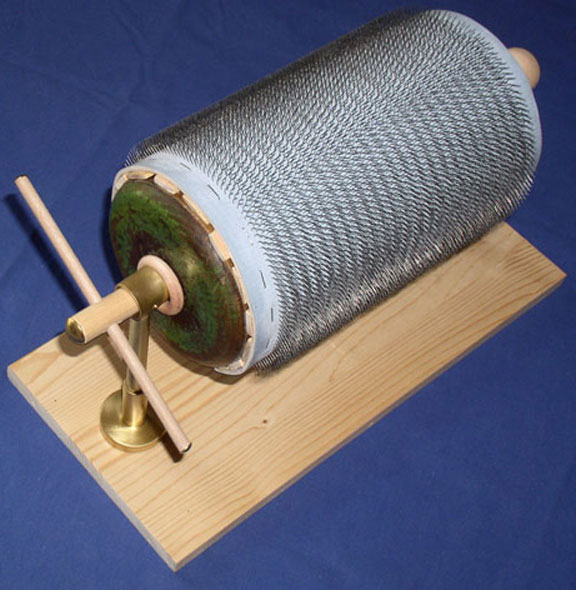
The plan was simple: transform the spool into a cylinder, cover the cylinder with carding cloth, mount the cylinder onto an axle with a handle at one end, then set this assemblage into a support structure where it could turn freely.
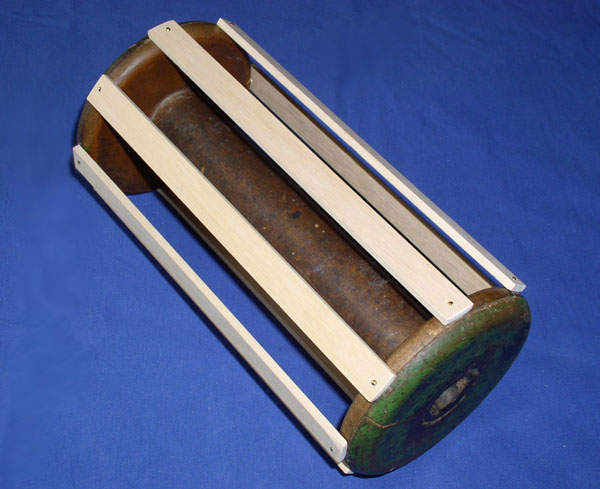
The first step was to transform the spool into a cylinder. I cut little slats the length of the spool and tacked them in place around the spool ends with tiny brads. The photo (right) shows half of the slats in place.
By the way, if you don't have a big spool on hand, you can still do this! Instead of a spool, use two wooden discs. Drill a hole in their centers and mount them on the large dowel you plan to use as an axle. Once they're mounted, place them 9 inches apart (the standard width of carding cloth) and tack little slats around their outsides to create a cylinder. Make sure you leave enough dowel sticking out of both ends, or mounting the drum will be difficult!
The carding cloth was the most expensive part of this carder. It's made by the Howard Brush Company, and you'll need to special-order it from one of their suppliers. (Luckily, that's easy!) You order it by the inch; and the number of inches you'll need is the same as the circumference of your drum, minus 1/2-inch or so. (The inches of cloth you order is the number of inches that will have wires in it; there will be a blank border all around the cloth to make it easy to attach to the drum.) You won't get a choice on its width; there's just the one.
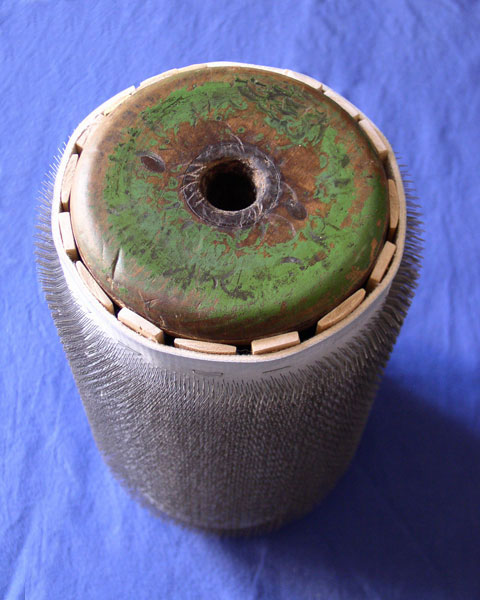
When the carding cloth arrives at your house, you'll probably want to let it "rest" for a day; it's usually rolled for shipment, and it's easier to handle when flat. Attaching the cloth to the drum requires a staple gun and patience. Start at the midpoint of the cloth and work your way toward the ends, stapling the cloth to the drum at 1-inch intervals. Work slowly, making sure the cloth is smooth and as flush as possible with the cylinder's surface.
When the sides of the cloth (a.k.a, ends of the drum) have been attached, you're ready to tackle the seam; and this is the tricky part. You must have a firm slat on which to staple the ends of the carding cloth; if their seam falls on a space between slats, it will not hold. (Please don't ask how I know this!)
When you've figured out where the seam will be, trim one end of the cloth so it falls smack on the seamline (you can trim it with scissors or a sharp knife). Make sure to leave enough blank cloth space so you can fit your staple gun in there and use it! Tack this first end down with a couple of temporary staples, and lay the other end of the cloth down on top of this one. Mark where the seam falls on this new end and carefully trim it so it butts flush against the other end. Take out the temporary staples and anchor the two ends together, straddling the seamline with the 'legs' of each staple.
This is the point of exhilaration, when the drum really starts looking like a carder!
The next step is installing the axle, unless you started with two wooden discs and a large dowel instead of a big spool. Use a dowel thick enough to carry a good amount of weight without strain. Slide it through the drum's center hole, adjust its position, and shim it in place by hammering little pieces of wood into the space between the dowel and the center hole. Remember to do both ends.
From this point onward, you need to be aware of which way you want the drum to turn when you're working with it. The wires will card properly in only one direction (just like with hand cards). Think of what it will feel like to turn the drum, watch the wires, and you'll know which direction it needs to go; and that knowledge will tell you which end of the axle gets the handle. ;-)
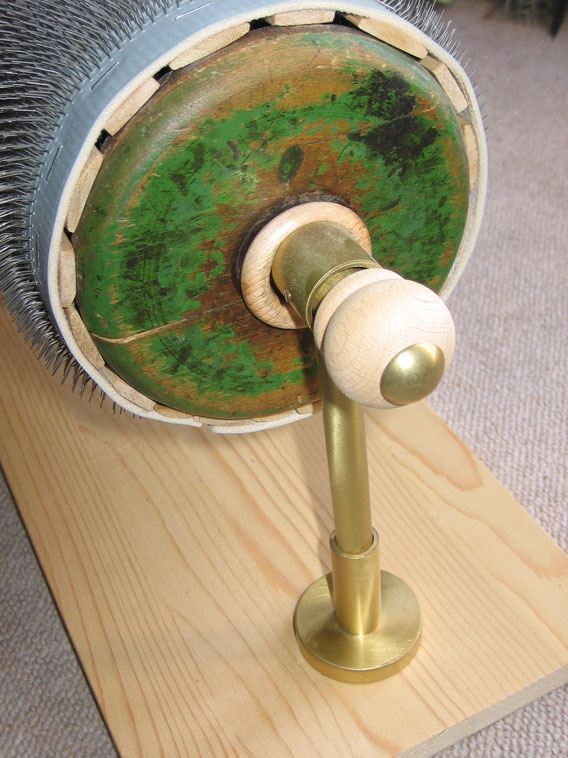
To mount the carding drum on a stand, I used curtain-rod support brackets to hold onto the axle. You can find these in many places: hardware stores, home decoration shops, even some fabric stores.
Looking at carder's back end (right), you can see just how many ways curtain-related hardware can help: a curtain-rod support bracket holds the axle and acts as an upright on the pine board base; a wooden curtain ring acts as a spacer between the bracket and the end of the drum; and a curtain-rod end-cap (wooden, with a brass-tack trim) puts a finishing touch on the end of the dowel. (As always, click on the photo to see a larger view.)
Because both ends of the axle need to be supported fairly close to the ends of the drum, you need to attach the second mount for the axle after the first one has been secured to the base -- and with the axle (and spacer rings) in position in the supports. (Don't ask me how I learned this, either.)
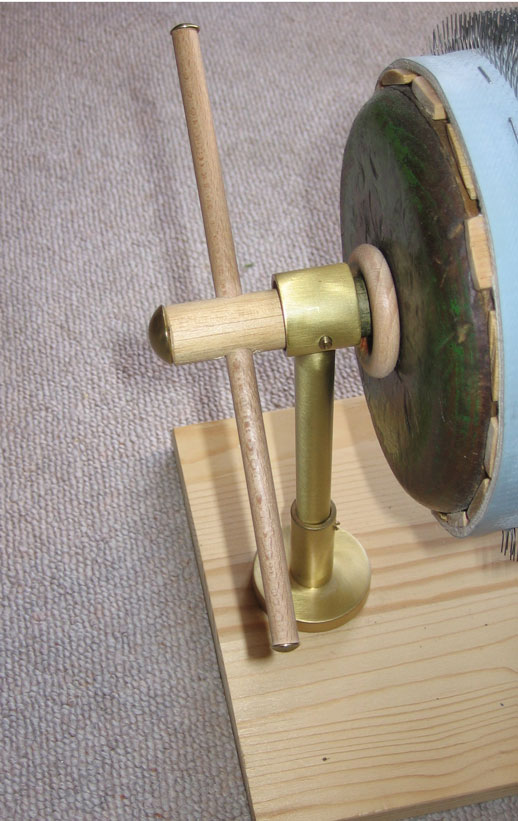
On the "business" end of the carder, the final task was to attach a handle to the axle. I wanted to keep the woodworking required to a minimum (the better to match my skills!), and after several false starts came up with the handle you see in the photo (left). It's simplicity itself: a hole is drilled through the axle dowel, and a smaller dowel that fits snugly is pushed through it.
It was easy to do -- but even better: it works!
The bottom line. One of the motivating factors for building this carding drum was the price of commercial drum carders. The final cost of this carding drum, including the purchase of a staple gun, was less than $100.
In use, it takes care of my needs. In a given span of time, I can card five times as much fiber on this drum as I could with my hand cards; and the results are excellent. I'm now thinking of building a second carding drum with finer carding cloth, for my more 'exotic' blends!
On the downside, it isn't as efficient or fast as a commercial drum carder. Because it has no 'licker-in' drum, you must feed it fiber from your hand. The fiber needs to be well-teased before carding. And for best results you must burnish the fiber down with a brush as you card the batt so it nestles nicely between the wires (I use a soft cat brush for this).
Because of that, it's not for everyone. But for me, it handles more fiber more effectively than a pair of hand cards, the price was darned good, and building it was an easy and interesting project.
I can't ask much more than that!